

Ever since she was really little, I saw all of these adorable pictures of first birthday cake smashes on Pinterest, and I knew I wanted to do something like that for Kate's
first birthday.
So, I gave it try. Here's how our little adventure turned out:
We had so much fun setting up this photo shoot and watching Kate smash her first birthday cake, and I love how the pictures turned out. So today I wanted to give you a little behind-the-scenes peek into how we did it, and offer you a few tips that we learned along the way.
How to Create an Adorable First Birthday Cake Smash
(5 Easy Steps)
Note: This post contains affiliate links. Click here to read my full disclosure statement.
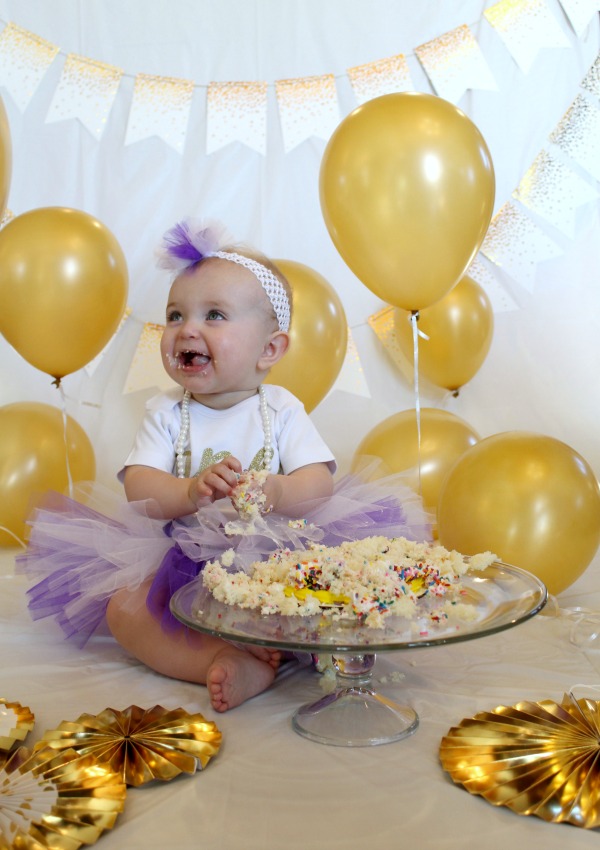
STEP 1: Choose a color scheme

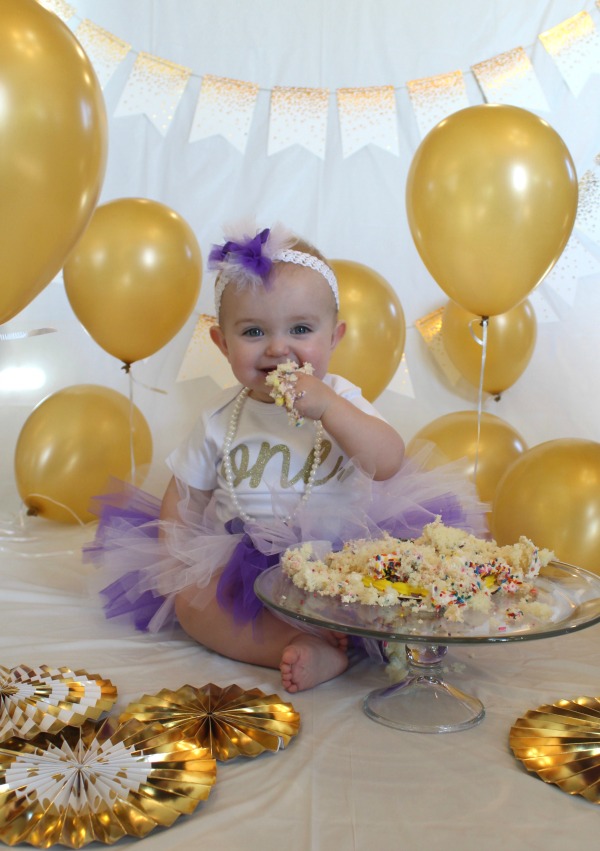
I decided to go with purple and gold. If you start out by picking one or two colors you want to use, finding your decorations and planning an outfit will be a snap.
STEP 2: Pick out an adorable outfit
Once I knew what colors I wanted to use, I started looking for a cute outfit for Kate to wear. I found this tutu and headband at a consignment sale and knew that they would be perfect. But there are tons of options to choose from online if you're looking for something new.
I think this one is especially adorable for a little girl, or if you're looking for an outfit for your little man, you just have to check this one out. Aaaaah, I can't stand the cuteness! :)

STEP 3: Gather the rest of your supplies ahead of time

I gathered everything in a big bag about a week beforehand so I would be ready for the big day. This saved me from running all over the place and being exhausted before we even began the photo shoot. Here are all of the supplies I used:
- Plastic disposable white tablecloths (for a backdrop, although if I could go back and do it again I would use a white sheet instead because our tablecloths got a little wrinkly!)
- Gold confetti banner from Target
- Gold and white lanterns from Target
- Gold balloons (and we actually used this helium tank to fill them up right at home)
- Cake dome (we just used the bottom part as a stand)
- Cake
- Baby outfit and necklace
For our cake, we used a $5 pre-made one that we picked up at the grocery store. A lot of people go all out and get gorgeous, personalized cakes.
If that's you- awesome! You will get some amazing pictures. We opted out of a super expensive cake that we wouldn't even get to eat ourselves. (Can you tell what our priorities are? haha!)
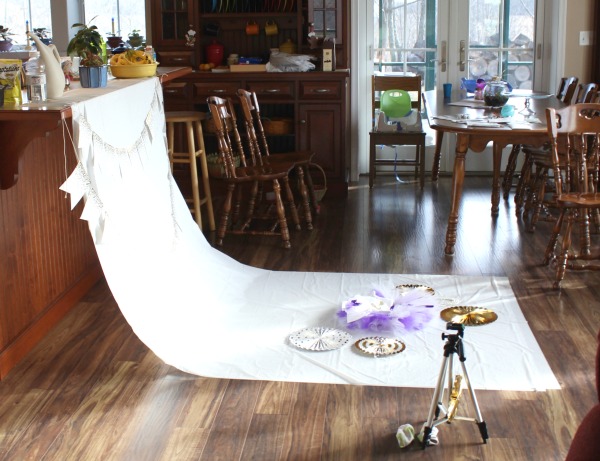
STEP 4: Choose a spot and set up your backdrop

I pushed the dining room table to the side, draped our tablecloth over the kitchen bar and secured it with a big bowl of fruit and a watering can. :) Creative cropping means no one (except for you guys!) will ever know.
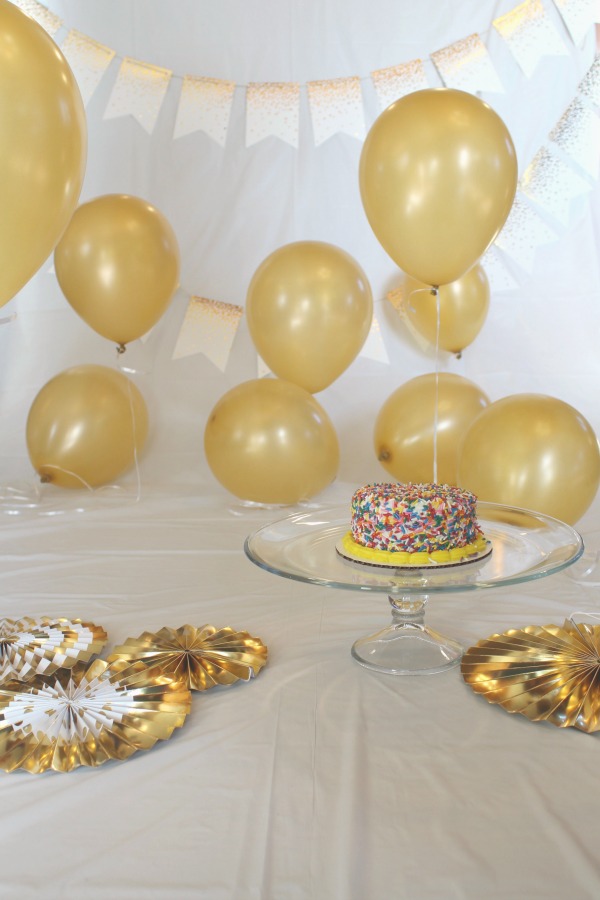
Next, I added the cake stand and decided where I wanted Kate to sit. Then I added our decorations.
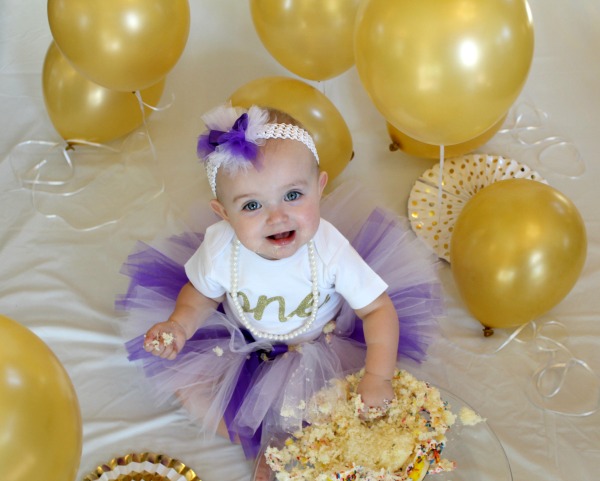
When you add your decorations, the key is that you want to have different things at a few different levels- don't just put everything on the ground. We hung flags across the back of the scene, fans on the floor, and balloons at a few different heights to add some depth.
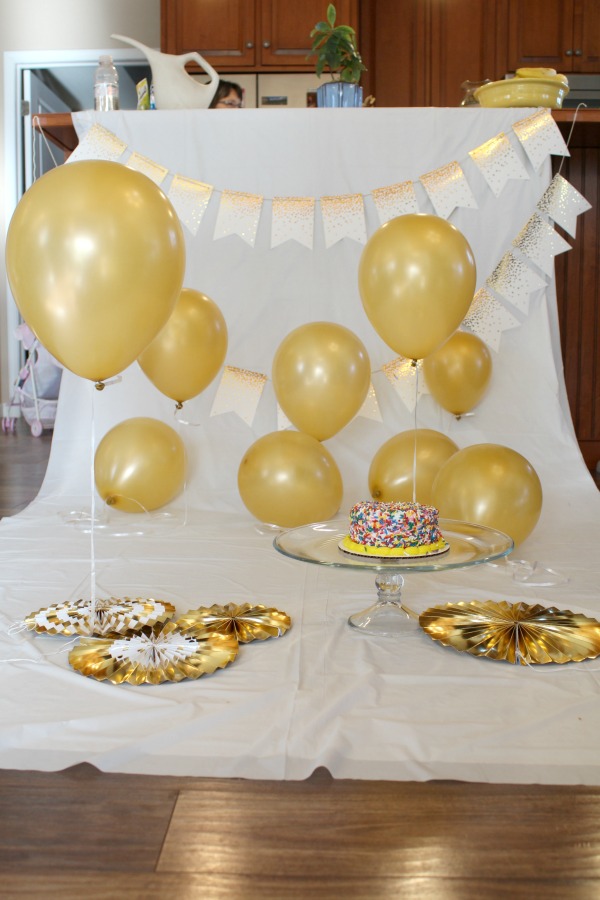
I just taped the balloon strings to the floor. Initially I made them way too high, so I had to lower them. Just think about where your baby's head will be and don't go too much higher than that.
TIP: Set up your camera (and tripod, if you're using one) now.
Take a few practice shots. Make sure that everything looks the way you want it to before you add your baby. Otherwise you might miss some great shots while you're messing with your camera.
 |
| Camera check: looks good! |

STEP 5: Add your baby and snap away!

This is the really fun part! I couldn't wait to see what Kate would do with her first cake. It turns out, she had a wonderful time smashing it into little pieces without once tasting it! When we finally convinced her to take a bite, she gave us the BIGGEST smile.
Bonus tips for a successful cake smash:
Here are a few more little tips we picked up along the way:
- BONUS TIP #1: Call in help
I would highly recommend having someone else help entertain your baby while you set everything up. We did our cake smash at my parents' house. It was great to have a few extra helping hands, and everyone had fun cheering Kate on as she smashed her cake.

- BONUS TIP #2: Plan your photo shoot during the daytime.
Your pictures will look lighter and brighter if you can use natural daylight (for example, near a sunny window.) If it's dark outside, you'll have to rely on the dimmer, yellowish glow from your houselights.
- BONUS TIP #3: Take shots from different positions
I mostly took pictures from right in front of Kate, but I got one of my favorite shots when I leaned above her and made noises until she looked up.
- BONUS TIP #4: Make sure your baby is full and awake.
You could have the most beautiful setup in the world, but if your baby is hungry, tired or crabby, you won't get very many great pictures. So maybe don't plan to do this right before nap time or lunchtime. You'll get much better results with a happy baby!

So, there you have it! 5 easy steps to create an adorable first birthday cake smash photo shoot. Just to refresh your memory, all you have to do is:
1. Choose a color scheme
2. Pick out an adorable outfit
3. Gather your decorations ahead of time
4. Set up your backdrop
5. Add your baby and snap away!
Love it? Pin it! 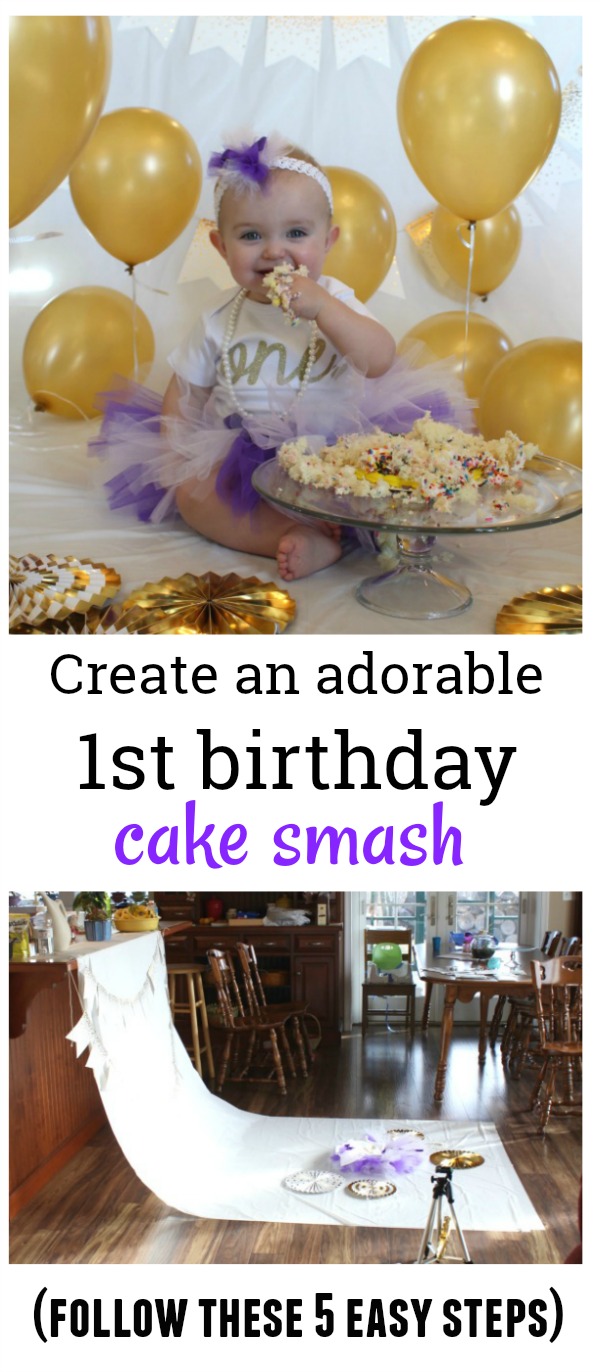 |
| Pin it! |

