 I can't believe Kate has already been home with us for 3 weeks. And I'm just now sharing the pictures of her nursery. If you read my Welcome, Kate! post (or if you follow me on Instagram) then you know that we waited around for this baby to come for quite some time. I had so much fun getting her nursery ready, partially because it made all that
Showing posts with label DIY. Show all posts
Showing posts with label DIY. Show all posts
Kate's pink and gray nursery reveal
I can't believe Kate has already been home with us for 3 weeks. And I'm just now sharing the pictures of her nursery. If you read my Welcome, Kate! post (or if you follow me on Instagram) then you know that we waited around for this baby to come for quite some time. I had so much fun getting her nursery ready, partially because it made all thatCreative gifts for one year olds: Part 3 of 3 (Photos of family and friends)
Note: This post includes affiliate links. Read my full disclosure statement here.
Looking for a creative and personal gift idea for a one year old? Want to find something they'll actually play with over and over (instead of taking one look at it and spending the rest of the afternoon playing with the box?) As a mother of a 14-month-old, I have a few tested and approved ideas for you!
(If you missed it, be sure to go back and check out my other ideas for creative gifts for one year olds here and here.)
Today's gift idea is all about photos of family and friends. Emma LOVES to look at pictures of people that she knows. Plus, she's just learning to say names (Grandpa is "Pa-Pa," Aunt Amy is "Emy" and her cousin Blair is "Bay") so this is great practice for her.

For this gift, I have two different ideas to share with you. The first one was actually a Christmas gift from my parents. They printed out a bunch of photos of Emma with different family members and friends, and framed them using these foam frames from Amazon .
.

The result was fantastic! We keep the photos in a basket on Emma's toy shelf, and she gets them out to play with all the time.

She loves carrying them around, and spends a lot of time pointing at each person and practicing saying their names.


The frames are great- they are perfect for Emma's little hands, and I love how soft and bendable they are. However, I do have to say that without any reinforcement, your toddler will be able to pull the photos out of the frames (something that Emma did within the first few hours.) I fixed the problem by using packing tape to secure the back of each frame, and haven't had any issues since. A dab of glue would probably be just as effective. 


Not into the photo frames? Here's another option: A printed "Family and Friends" photo book. We ordered ours through Shutterfly.

It was a really simple process, and Emma sits and "reads" this entire book at least once a day. She really loves it!

Each family member got one page. At the end I added pictures of some of her friends as well.


So that's it! Two ideas for ways to use family photos to make a creative and personalized gift that your toddler will play with over and over. What do you think?


What to do with monthly baby pictures

Nowadays, it seems like everyone is taking monthly baby pictures. Not wanting to miss out, I also took pictures of Emma every month. One of my friends gave me onesies at my baby shower with numbers painted on them, and I had so much fun taking pictures of Emma in her special onesies every month.  But what to do with all those adorable photos? Why, display them at her first birthday party, of course! I decided to make a banner using all of her monthly baby pictures and hang them up in front of our dining room window for the party.
But what to do with all those adorable photos? Why, display them at her first birthday party, of course! I decided to make a banner using all of her monthly baby pictures and hang them up in front of our dining room window for the party. 
Creative birthday gift ideas for a one year old: Part 2 of 3
Did you catch my last post on making a DIY makeup kit as a gift for a one-year-old? Today I'm sharing another super-creative gift idea for a one-year-old that you can assemble yourself, and they'll play with over and over.
Update: Make sure to check out part 3 in the series here!

Ever since she was a few months old and first started picking things up, my daughter has loved playing with the contents of my purse. Wallet, keys, phone- she loves it all! So I decided to assemble a purse of her own for her first birthday.

I found a small purse at a thrift store (I did clean it, but if you're squeamish about germs you could purchase an inexpensive new bag.) I made sure it was small enough that Emma could easily carry it around. I also bought a wallet at the same thrift store. This one looks a lot like mine, so I knew she would love it!
Next, I added a pack of tissues, my old iPhone, and some keys on a keychain. The keys were new (I was attempting to avoid germs) but I did find that the newly cut keys had really sharp edges- so be careful if you decide to take that route.
Next, I found some things to put in the wallet.


Creative birthday gift ideas for a one year old: Part 1 of 3
My daughter, Emma, (who just turned one) loves to play with "toys" that are not toys at all. One time she found a ping pong ball and refused to put it down for two days straight. I am not even exaggerating. She took it into the bathtub with her, she slept with it, and she did everything one-handed for 48 hours.
This got me thinking.

When I thought about it, I realized that all of my daughter's favorite things to play with have three things in common:
1. She loves "taking things out." She likes bags and boxes, and little things that fit inside of other bigger things. She likes to empty things out, one thing at a time. I know this because she daily empties the tupperware out of the kitchen cabinet, the contents out of my purse, and clothes out of her drawers.
DIY first birthday party invitations: teddy bear theme
I can't believe that my tiny little baby is about to turn one! When we started to think about a first birthday party theme, it didn't take long to come up with the idea of a teddy bear party. Emma's third word (after "mama" and "dada") was "BEAR!" She loves playing with her stuffed bears, and often carries them around, giving them hugs and kisses.
Once we decided on a teddy bear theme, it didn't take me long to start envisioning invitation ideas. I never buy invitations because I have an invitation-making method that makes it sooo easy to DIY. Basically, I choose 2 types of paper to layer, print the details on the top sheet, and decorate however I want. It's really simple, but they always turn out looking great!

Once we decided on a teddy bear theme, it didn't take me long to start envisioning invitation ideas. I never buy invitations because I have an invitation-making method that makes it sooo easy to DIY. Basically, I choose 2 types of paper to layer, print the details on the top sheet, and decorate however I want. It's really simple, but they always turn out looking great!

How to make inexpensive, customized thank you cards (plus a free printable)

When we got back, Kevin's aunt and grandmother decided that Emma needed a sandbox in her own backyard as an early birthday present, and a few days later, we received an adorable turtle sandbox in the mail.
(In other news, they still make turtle sandboxes! I had one of these when I was little, and am quite pleased that now my own little girl gets to play in one.)
Well, the novelty of the sand has not worn off, and we've spent a lot of time this summer out in that sand turtle. But why am I sharing this story with you? Well, when someone gives you a special gift, you want to send them a special thank you card. Something that will really let them know that you appreciate them. So I decided to make my own thank you cards out of (what else?) a photo of Emma playing in her sandbox. And now I'm going to share how I did it with you, just in case you're looking for an adorable (and inexpensive!) way to tell someone, "Thanks!"
Here's what you do:
Step 1: Print out this cute thank you sign (or make your own, have your kids make their own, etc.) 
Step 2: Take a cute picture of yourself (or, in this case, my daughter) with the gift and the thank you sign. Here's the picture I used for the sand box thank you. I love the look of intense concentration on Emma's face. She takes her play very seriously!

Step 4: Copy the picture into a word document and hit enter a bunch of times so that the picture is at the bottom of the page. Think about where you want the fold in the card to be. Leave a bunch of space on the other side of that imaginary fold. ;) Here's what my word document looked like:

Step 5: If you want the card to fit into a certain sized envelope, right click on the picture to change the size.

Step 6: Print, fold your paper in half, and use a paper cutter to trim the sides. I decided to leave a strip of white on each side of the picture in order to make a little border.

And that's it! You're DONE!


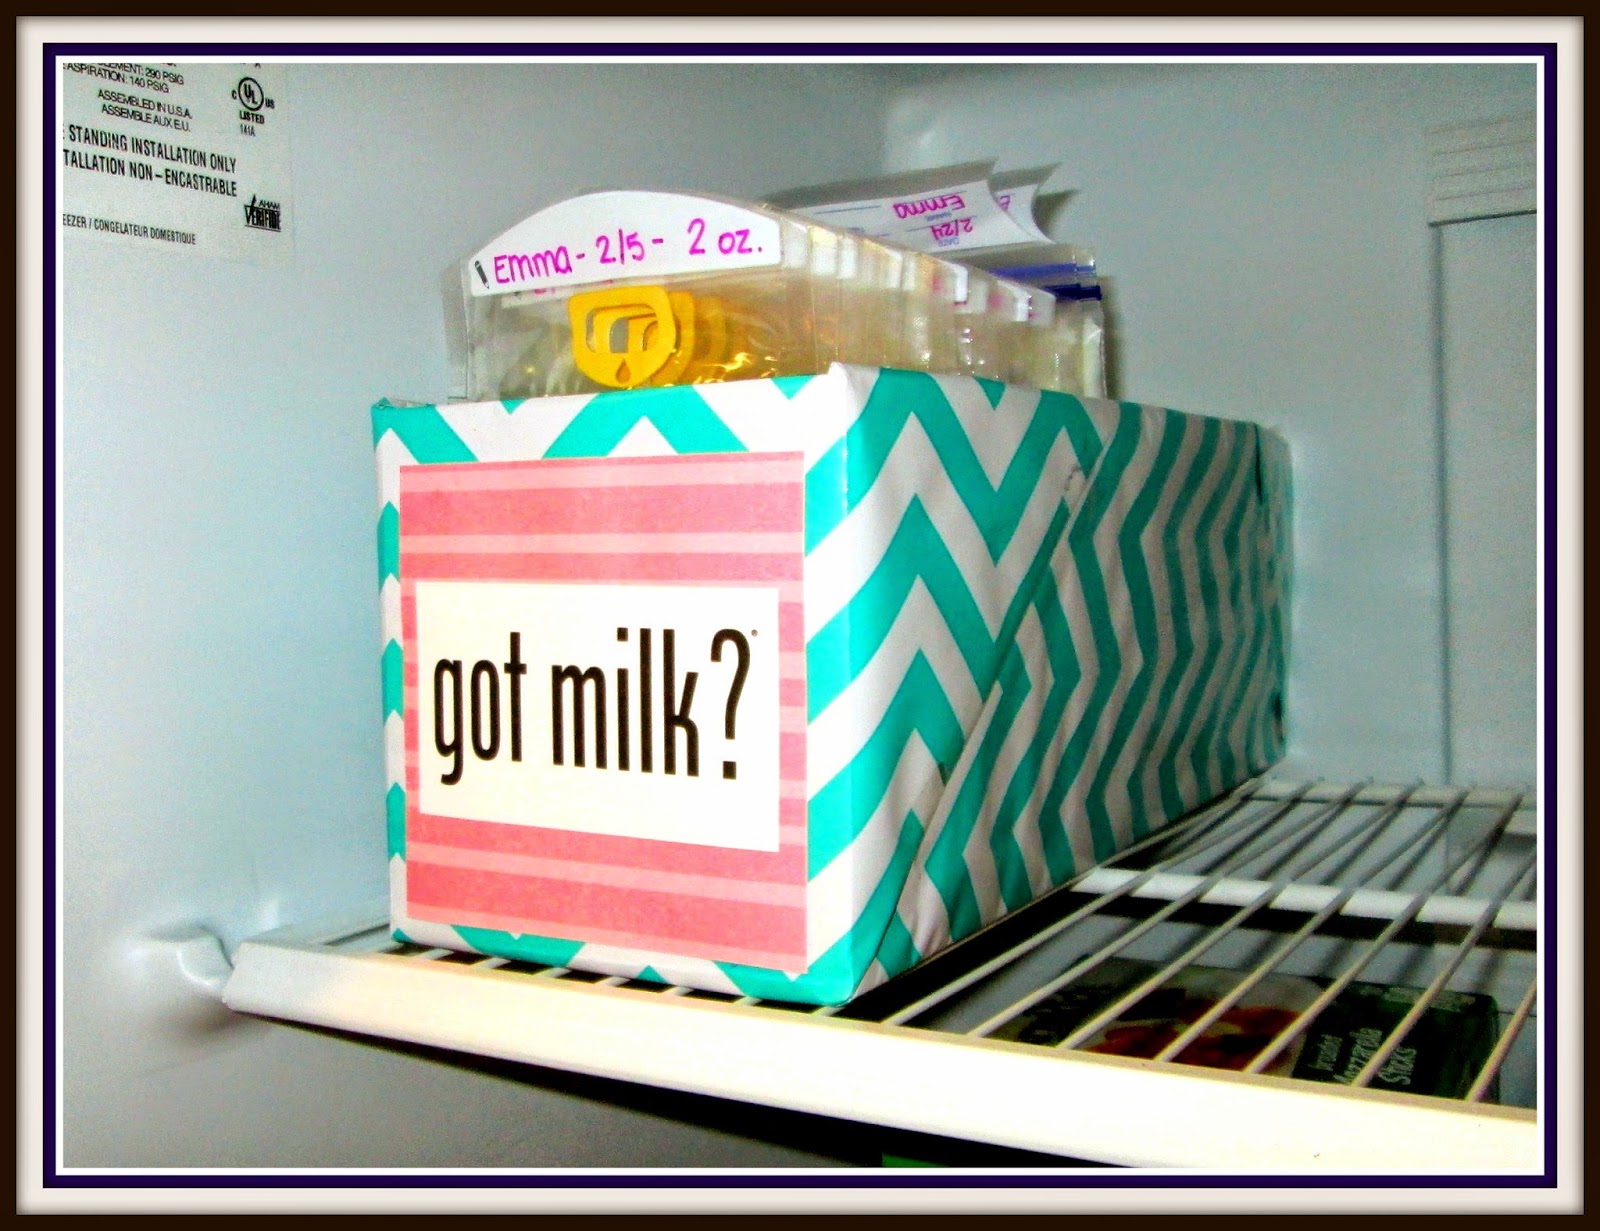
Breast Milk Freezer Storage from a Soda Can Box


Here's how you can make your own:
STEP 1: Cut the top off a soda can box.


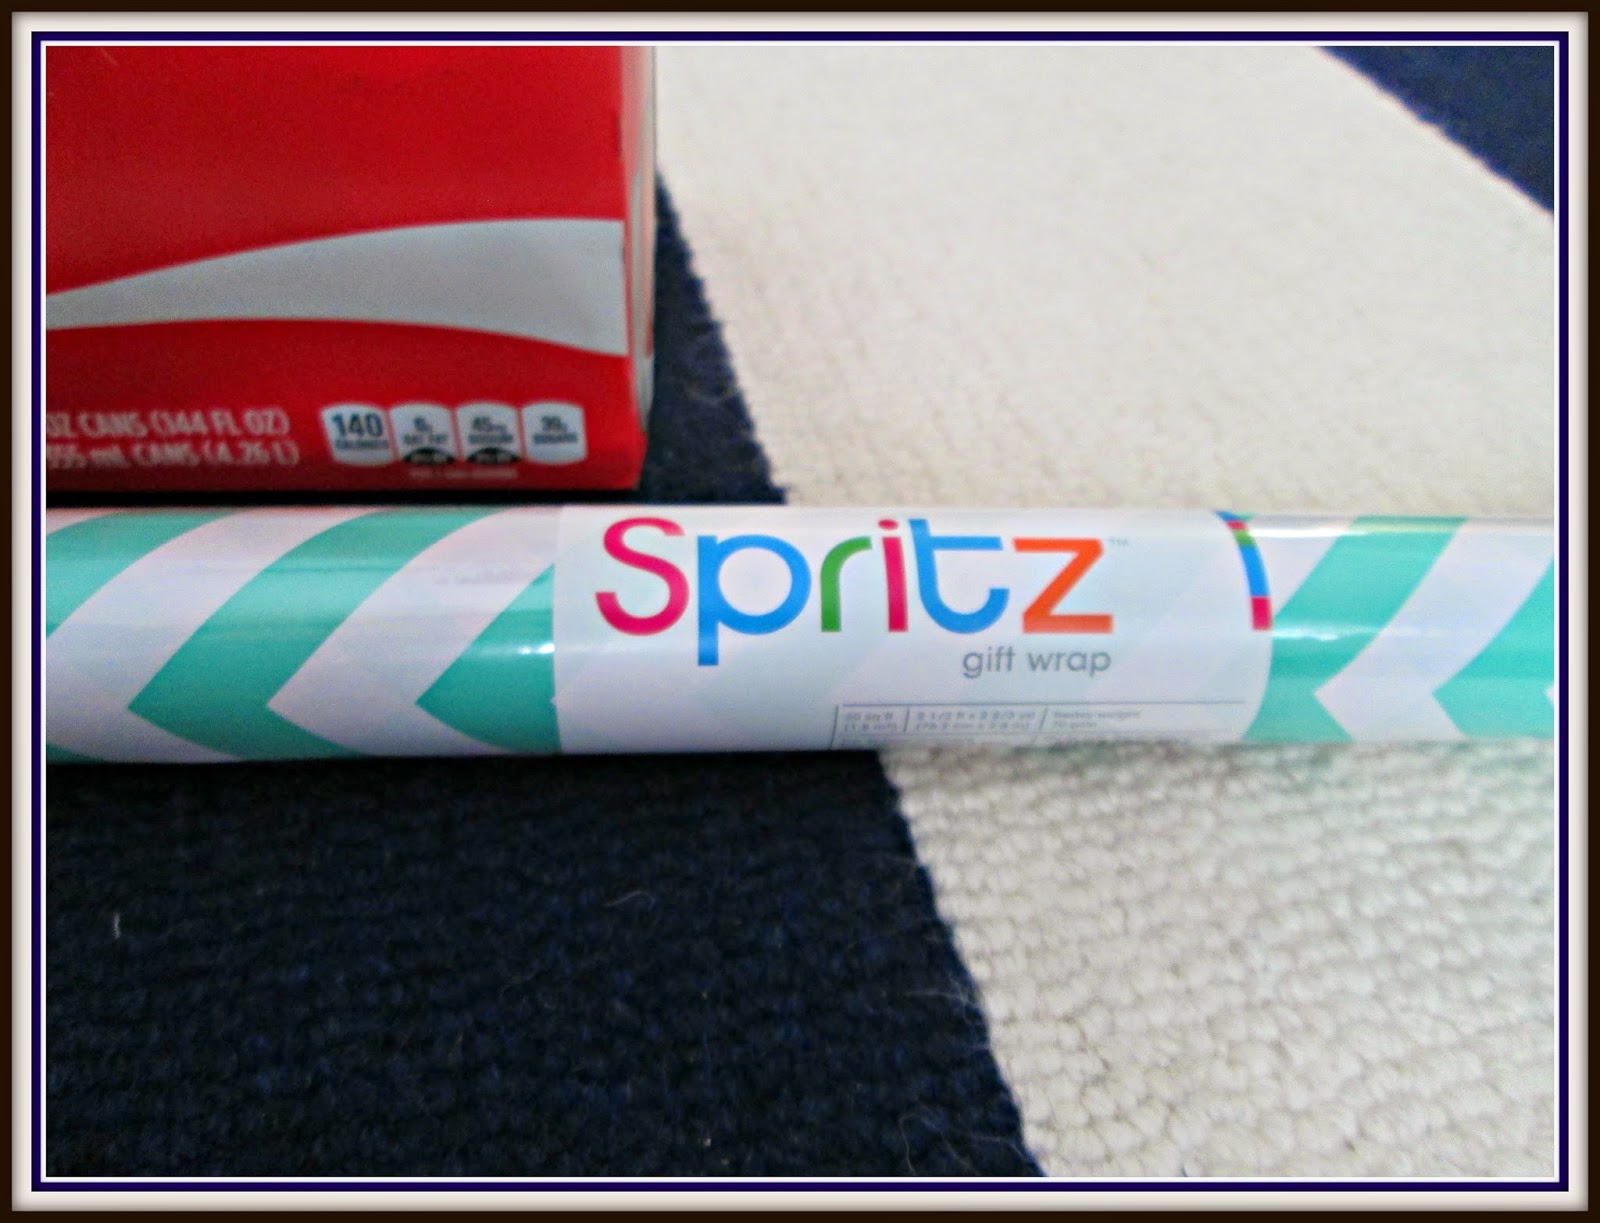


I printed this Got Milk? logo and glued it to a pretty piece of card stock.


Laura
Subscribe to:
Posts (Atom)